Red Velvet Cake – a perfect cake recipe to surprise your loved one this Valentine.
This Red Velvet Cake looks very beautiful and I promise that you will be amazed to see the results when you prepare this delicious cake at home to surprise someone you love.

This recipe is about Red Velvet Cake but I would rather like to call it a Valentine’s Day Cake because it is really a perfect cake recipe to celebrate Valentine’s Day. This Valentine’s Day cake is super red coloured and a perfect cake to celebrate the day by preparing this beautiful cake at home.
You can prepare Red Velvet Cake at home in any shapes – heart shape red velvet cake, round or square shaped as you prefer. However, if you are planning to prepare this cake at home for valentine’s day – you can use heart shaped cake tins to prepare this wonderful cake recipe. The designs of this cake vary as per ones choice and you can make this cake in any design as you like.
My Memories of Red Velvet Cake
This is an eggless cake and I haven’t even used vinegar in this recipe. Ideally, cream cheese frosting is used to prepare Red Velvet Cake. However, I chose to use whipped cream instead to cook this Red Velvet Cake and it turned out really nice.
Mastering the technique of baking a cake takes time and the images you see in this blog is not of my first trial obviously. Just like almost every other cook, I failed quite a few times to master the perfect texture and look of this Red Velvet Cake. One can get very disappointed when trying such recipes for the first time as it is likely that you won’t get the desired results in your first try.
But that’s not end of the world, and I encourage you to keep trying always. That’s the only way to master food recipes and after all it’s not very tough – it just takes some time and patience. After failing a few times, I eventually found the perfect way to prepare a Red Velvet Cake Recipe.
A few points to make a perfect red coloured spongy cake
- Use Red Gel food colour instead of a liquid food colour.
- Always sieve baking powder and baking soda together with plain flour.
- Don’t leave any lumps of baking powder and baking soda (lumps create dark black spots in the cake).
- Try to bake on Gas stove and not oven (because oven baked cakes get darker on top).
- Vinegar and Lemon Juice both give velvety look to the cake, you can use either of those. But I prefer to use lemon juice as I don’t like smell of vinegar.
- And the final tip, add lemon juice at the very last when preparing batter for cake.
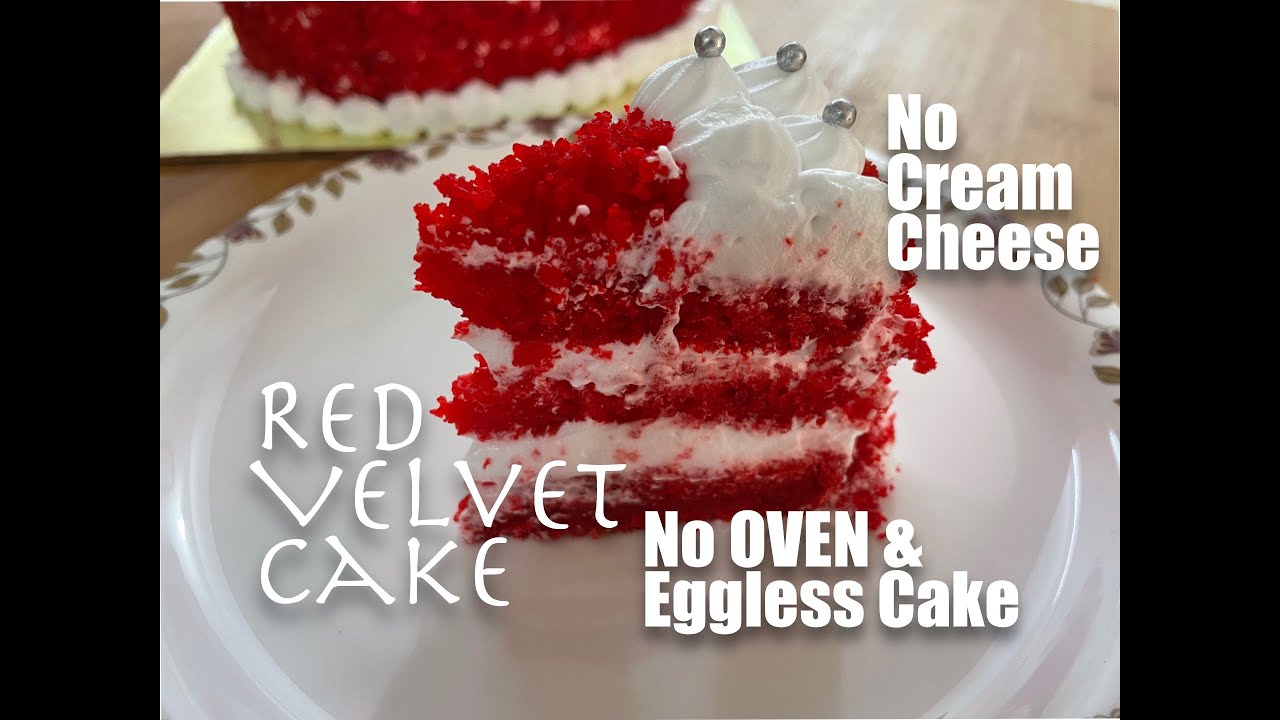
If you would like to watch this recipe on video then here is the complete YouTube video which describes the process of making Red Velvet Cake at home.
If you fancy ice creams, here is another recipe for Strawberries with Cream, I hope you enjoy that too.
Don’t forget to leave your suggestions, feedbacks and comments. Follow FoodQuench on social media and share your recipes by tagging @FoodQuench.

Eggless Red Velvet Cake Recipe without Oven | Valentine’s Day Recipe
Description
Ingredients for Red Velvet Cake
Cooking method for Red Velvet Cake
-
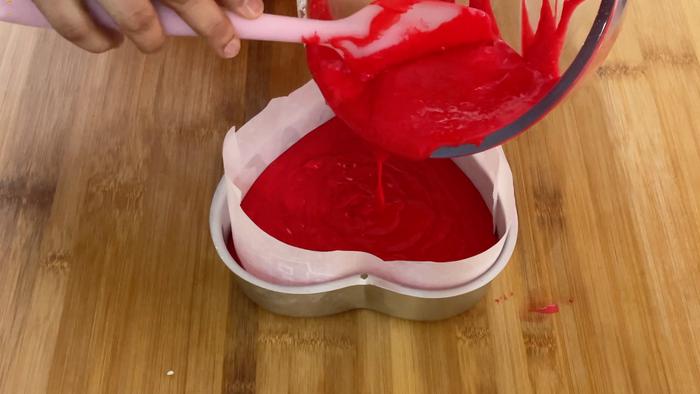
Brush cake tin completely with cooking oil and line with parchment paper.
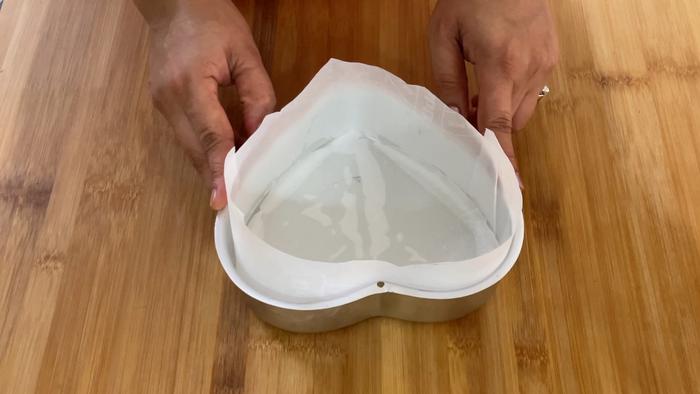 If you don't have parchment paper, then dust some dry plain flour after greasing oil on cake tin.
 -
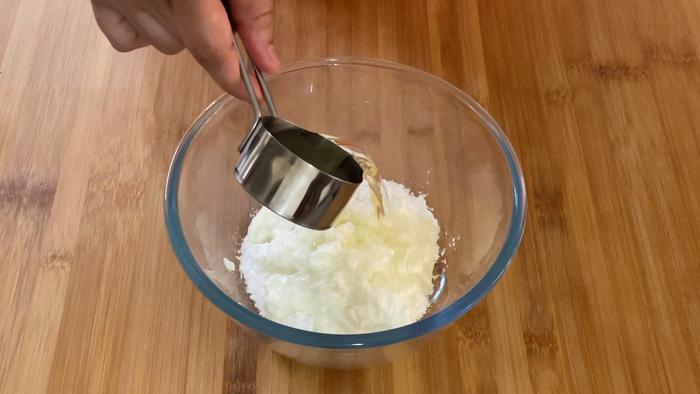
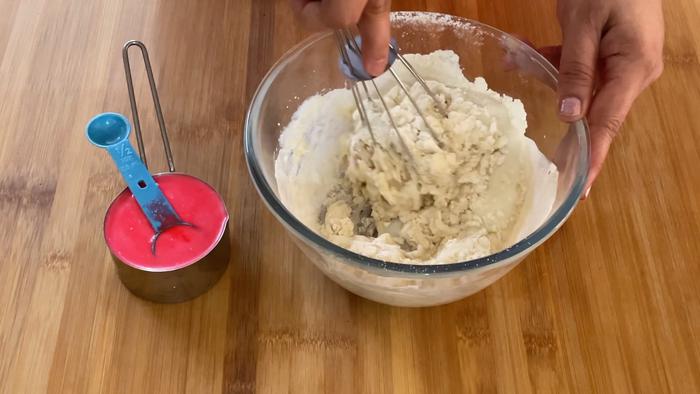
Take powdered sugar, curd and oil to a mixing bowl.
 Remember not to dark roast besan because we want to give yellowish look to Red Velvet Cake.
 -
Whisk all the ingredients very well with a whisker until batter is well mixed and very smooth.

-
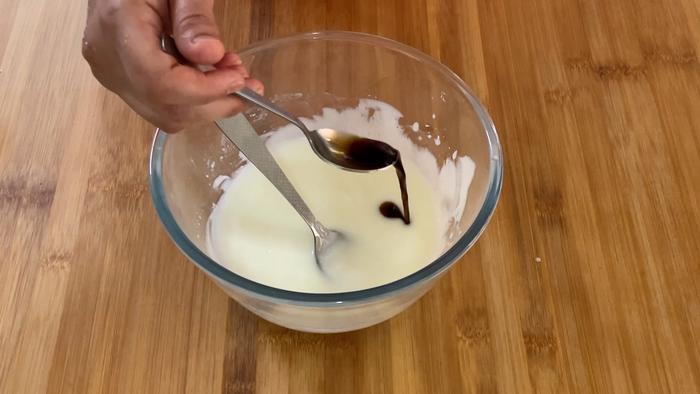
Once all ingredients are whisked well, add vanilla extract to it.
-
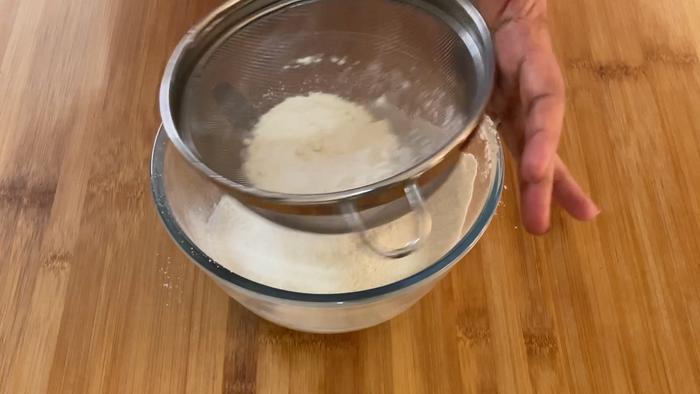
Then place a sieve on bowl and add below ingredients to it and sieve all dry ingredients together.
- Plain flour
- Baking powder
- Baking soda
-
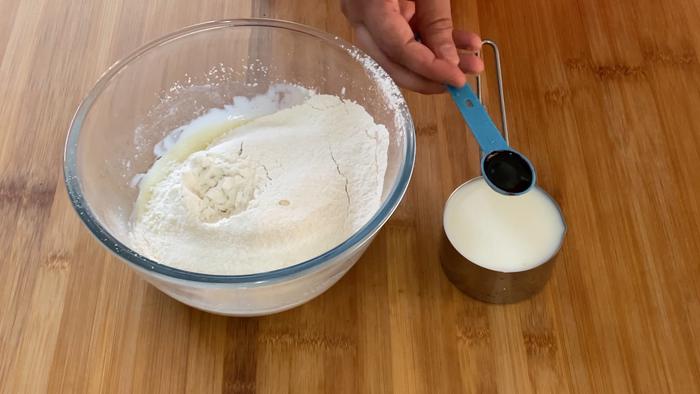
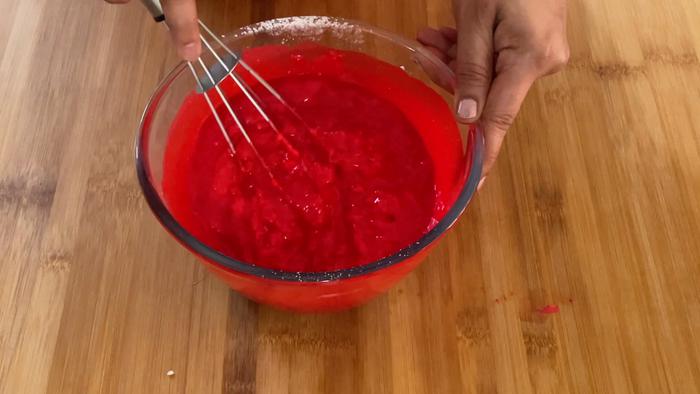
Now add red food gel colour to the milk and give it a good mix and keep aside.
You can visit this Red Velvet Cake YouTube Video to get a detailed view of this entire process.
-
Before adding milk, add curd to the cake mixture and mix all ingredients well.
-
Now give coloured milk a good stir and gradually mix it to the cake mixture. Mix using a whisker light handedly to remove lumps in the batter.
 Mix it light handedly and try to remove lumps.
 -
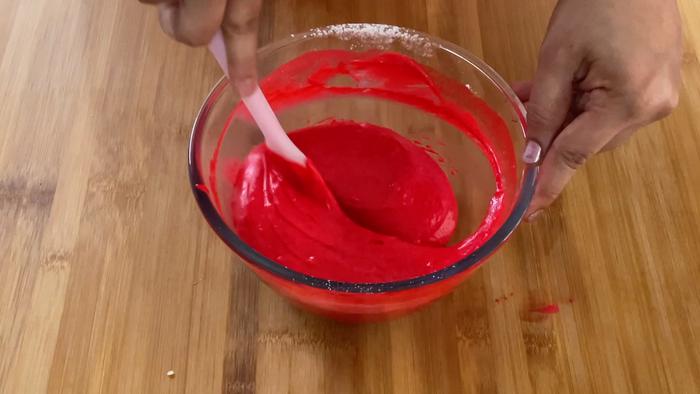
Then mix the batter with cut and fold method using spatula and remove all lumps.
-
Lastly add lemon juice to the batter and mix with cut and fold method for 5 to 6 times.
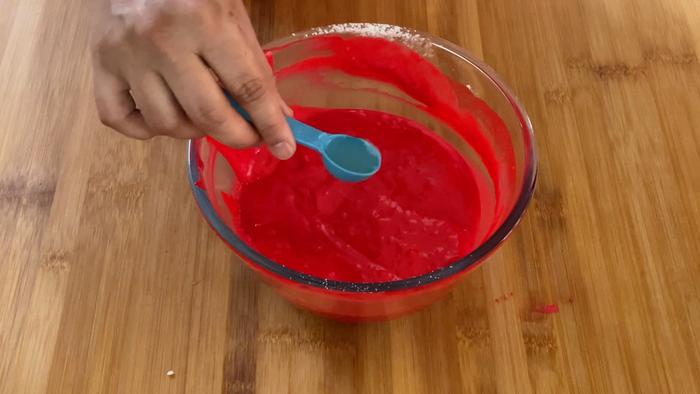 Don't over mix, cake will become dense if you keep it longer after adding lemon juice.
 -
Pour batter to the parchment paper lined cake tin and tap the cake tin well to remove air bubbles.
-
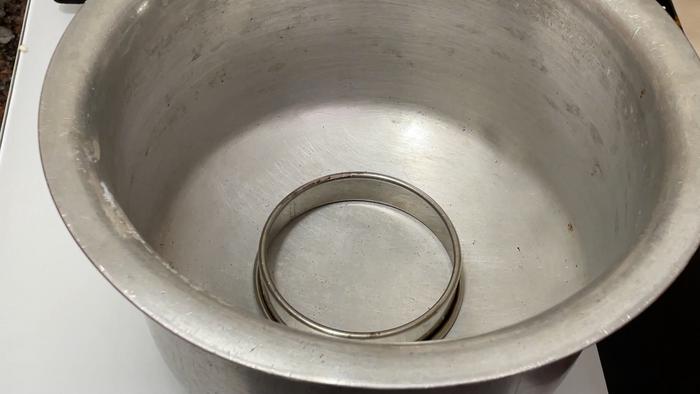
Pre-heat a kadhai or any aluminium vessel with enough height for cake to rise, and place a steel ring inside it.
 There is no need to put salt for baking cake.
 -
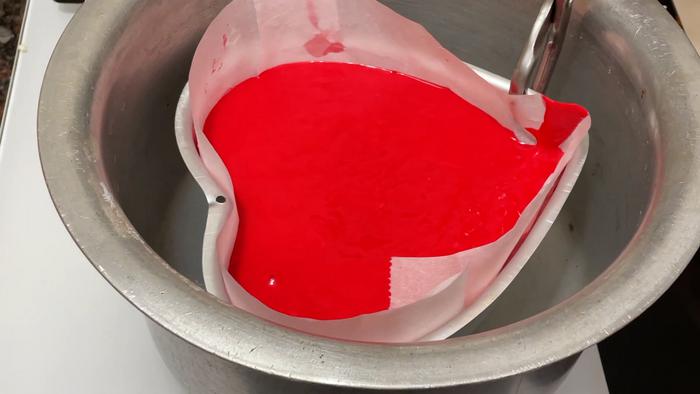
Place cake tin in the pre-heated aluminium vessel and cover with a plate. Bake cake for 40 to 45 minutes on a medium flame.
- Make sure there is enough height for cake to rise well.
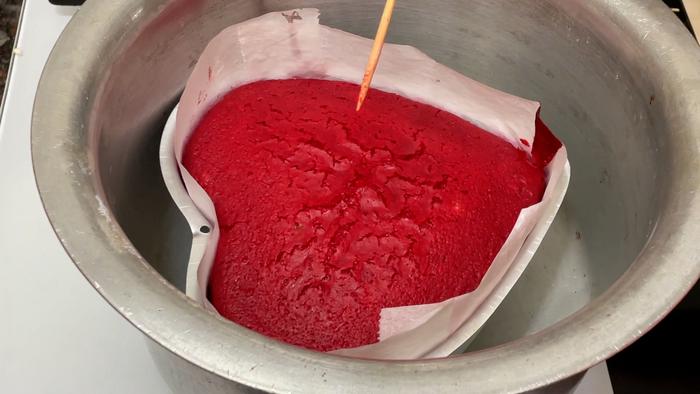
- After 40 minutes check once with skewer and if batter is sticky then bake for 5 to 10 minutes more.
-
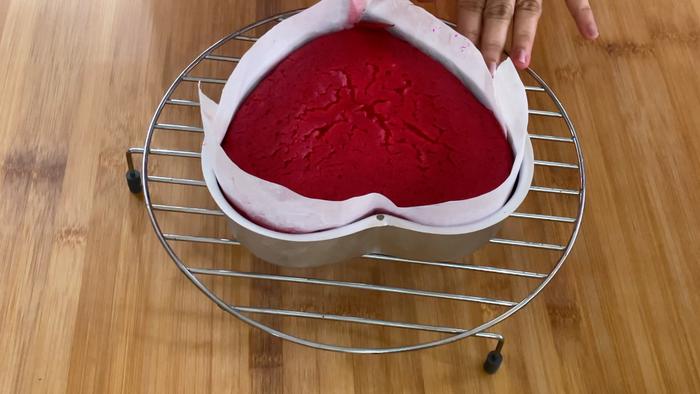
After 45 minutes, skewer came out clean, cake is perfectly baked. Look at the perfect and nice red colour 😍 .
-
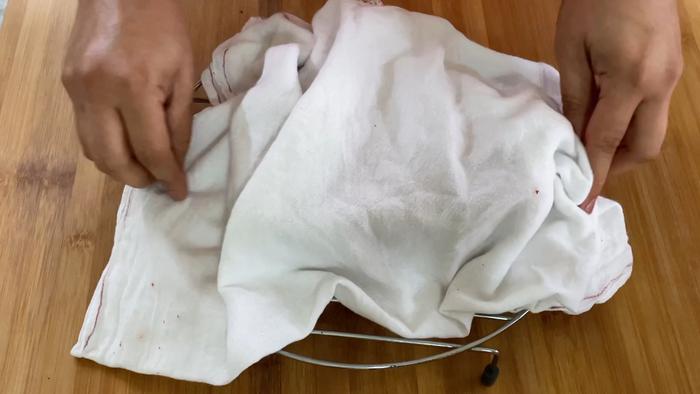
Transfer the cake to cooling rack. Cover with a cloth and allow to cool down for 15 minutes. After 15 minutes, remove parchment paper and demold cake from the tin.
-
Let it be on cooling rack covered with a cloth until cake has completely cooled down (takes about 6 to 7 hours).
- Cake cooling time depends on weather too. In summers cake might take more time to cool down and in winters it will take less.
- After it cools down, I prefer to keep it covered in an airtight container and do the cake decorating part next day.
-
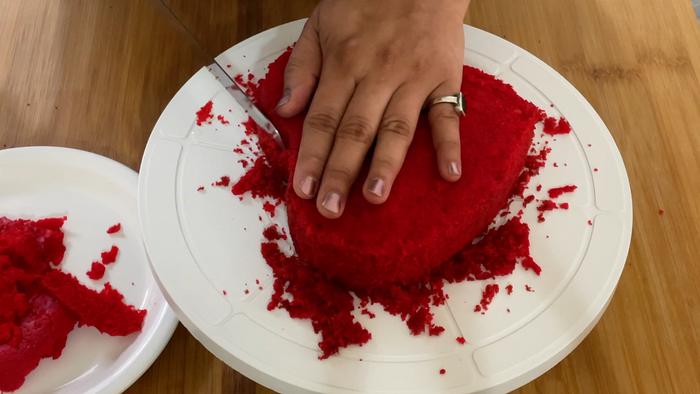
Once cake is cooled down completely, transfer cake to a turning table.
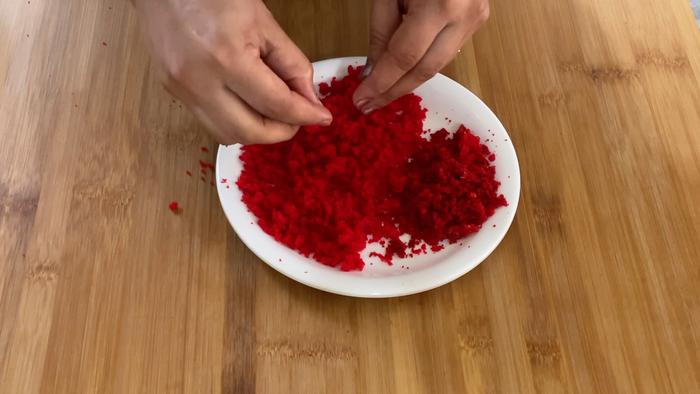
- Cut thin layer of the cake from top and keep it aside as we will break it and make crumbles out of it.
- Scrape sides of the cake and keep those granules aside as we need them to decorate the cake.
-
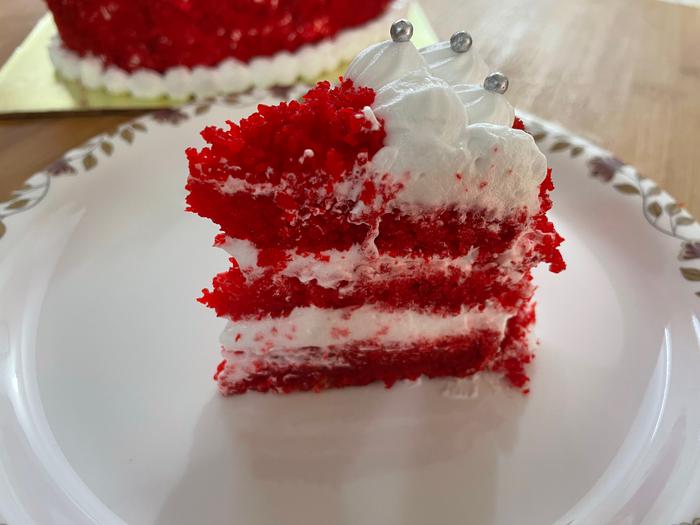
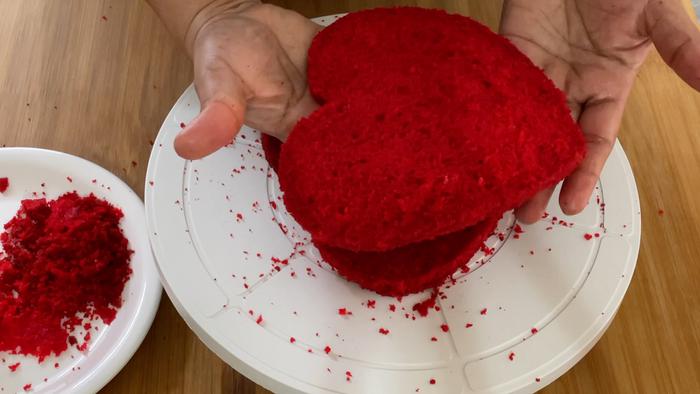
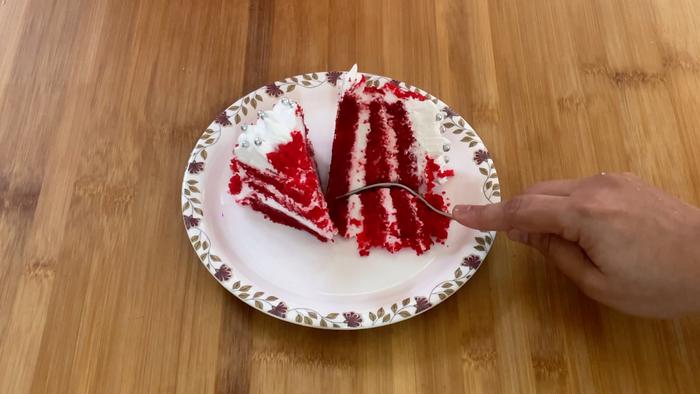
Then cut the cake into total of 3 layers (i.e. 2 cuts in the middle). Red Velvet cake looks perfect, light and spongy textured.
-
Now take that top thin layer we kept aside earlier and break it into crumbles. You can do it with hands or use grinder. However, make sure not to grind it into very fine granules.
-
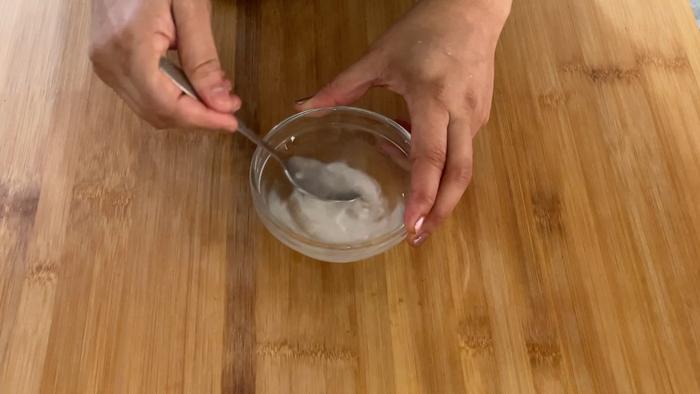
To prepare sugar syrup, take 3 to 4 table spoons of water and add 2 table spoons of powdered sugar to it. Mix until sugar is completely dissolved and sugar syrup will be ready for spreading on cake layers.
-
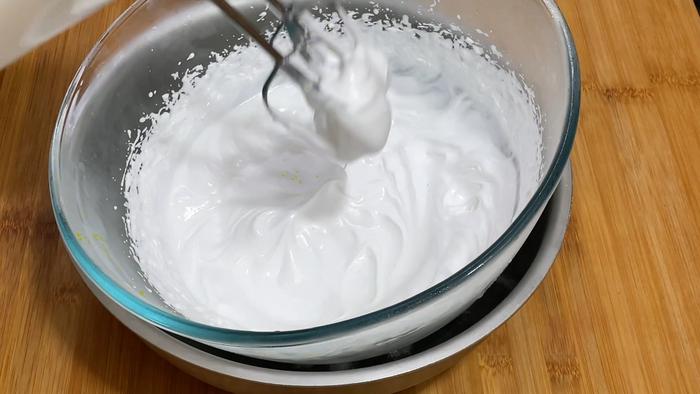
Now is the time to prepare whipped cream.
- Take a large bowl and add ice cubes to it.
- Add non-dairy whipping cream to a large bowl and place the whipping cream bowl on ice filled bowl.
- Whisk with electric whisker on high speed until you get soft peaks in the cream.
-
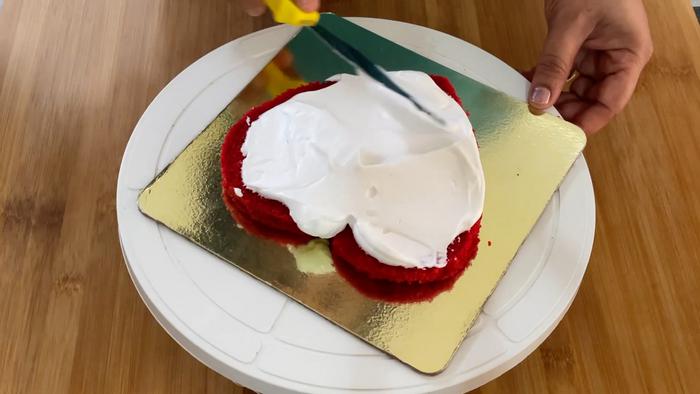
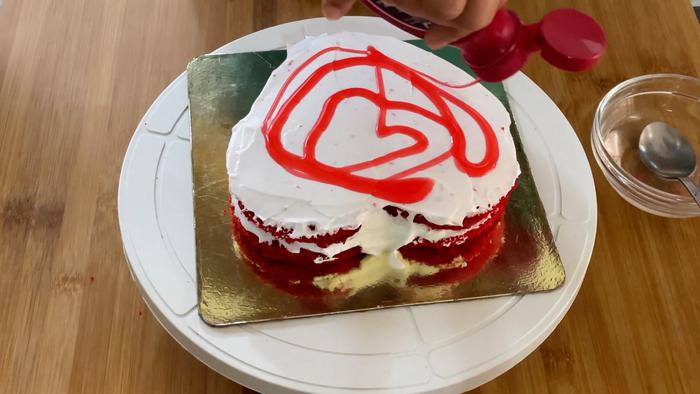
Now cake decoration time.
- Apply a small spoon of cream on the cake board (so that cake layer stick to the board).
- Then place one layer of cake on the cake board.
- Spread the sugar syrup we prepared.
- Add enough cream on the cake layer and spread with cake spatula.
- Then add strawberry syrup for nice flavour.
-
Repeat the process for all the layers - place a layer, then sugar syrup, whipped cream layer and strawberry syrup.
-
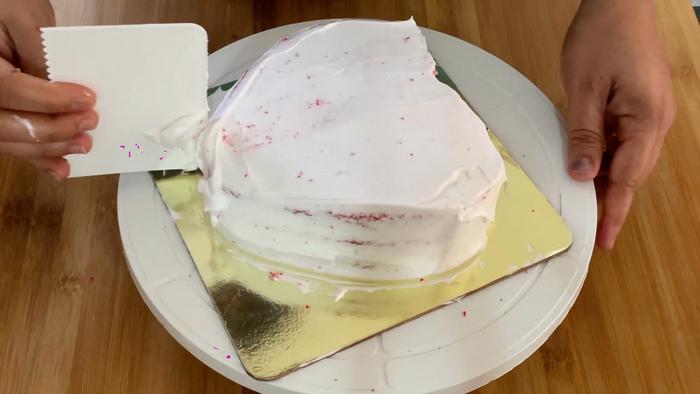
For the topmost layer do not add strawberry syrup, just the whipped cream would do.
- First spread the cream with cake spatula and try to even out as much as you can.
- Later use cake scrapper and give a smooth finishing to the whipped cream.
-
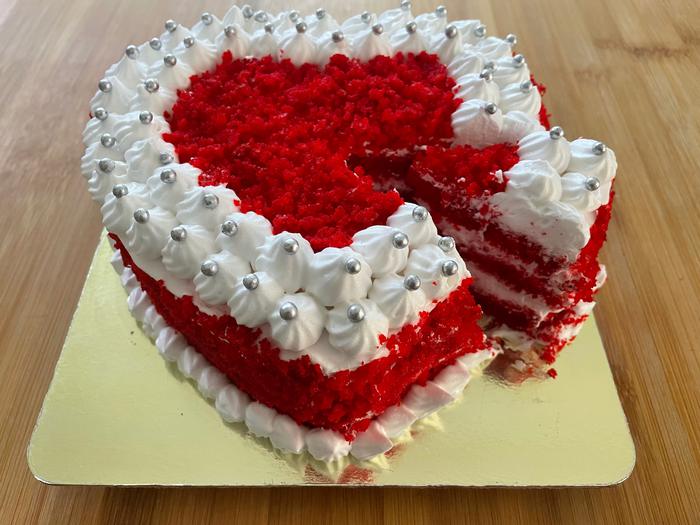
After covering entire cake with whipped cream, transfer remaining cream to the piping bag and make some flowers on the cake with any nozzle of your choice.
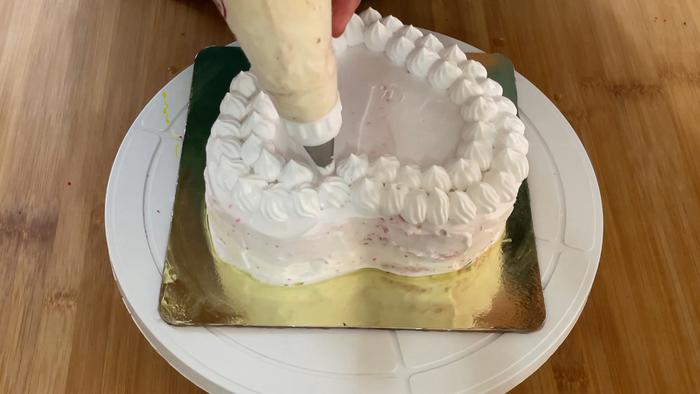 I made 2 layers of flower.
 -
Now fill center of the cake with red velvety crumbles and use knife or spoon to spread it carefully. Then cover the sides too with crumbles using hands and spatula.
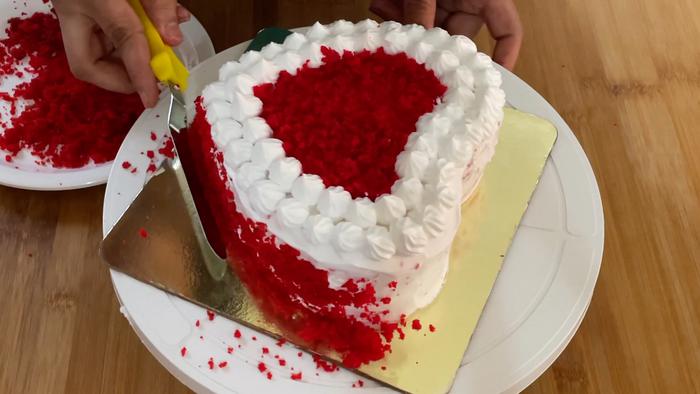
-
Finally, place some silver edible balls on each whipped cream flower tip.
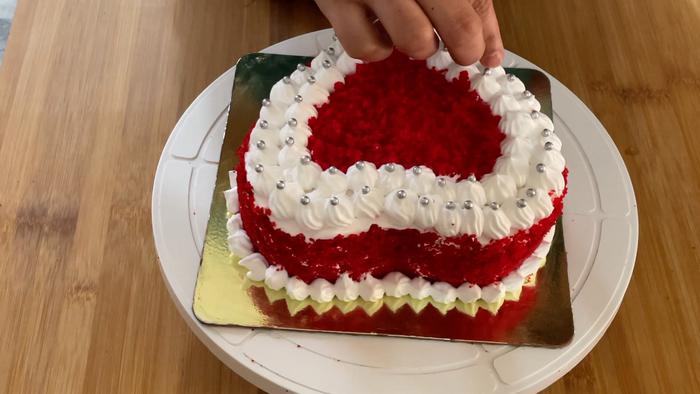
-
At last cut and serve the RED VELVET CAKE. You can also let the cake set for some time (30 minutes) in refrigerator or cut it immediately if you are like me and can't wait 😜 .
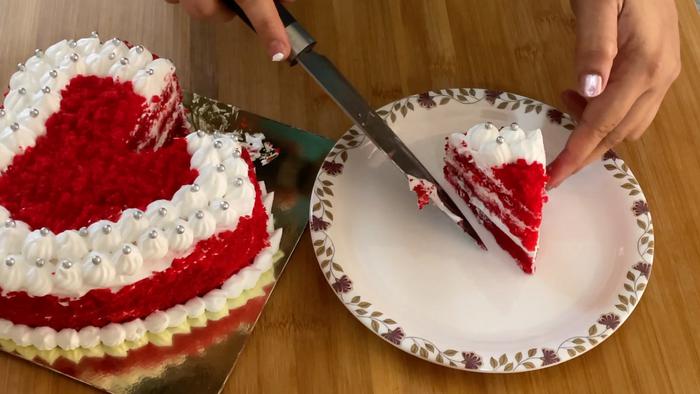 When you set in fridge, you can enjoy chilled red velvet cake, otherwise it will be at room temperature. CHOICE IS YOURS 😄 .
 -
Super soft and spongy Red Velvet Cake is ready.
-
Enjoy it anytime and refrigerate it for later if you want to.